
I loved everything she did so much that I've done many of them in the two years since. I always text her a picture of our re-creations in appreciation - starting with this one. I'm using it for Tried It Tuesday, and definitely think you should try it if you teach your own art.

I like to start off the year by doing more simple line drawings, learning about shades and tints, and this week's lesson...the color wheel. Art is something you can really go crazy with, and with this lesson, your students will have fun creating and get to eat their art afterward.
So here it is...the frosting color wheel!

This idea didn't come from me, or even my friend originally. After some browsing, I think this is the original. Check it out for more detailed directions.
I wanted to teach students about primary, secondary, and tertiary colors, and this is a fun way to do it.

Start with 12 Ritz crackers (you can also use vanilla wafers if you want everything to be sweet). The picture above is from before I forgot that we needed 12 and gave the students 9 instead. Oops :).
I asked the students if they knew what the primary colors were. They knew this already, so that was great. I had bought 3 containers of vanilla frosting to use one for each primary color. You could also buy them already colored if you can find them. I mixed up the primary colors in front of them. We talked about how the colors were not as vivid as the food coloring does not get the frosting as bright.
I gave each student a good size blog of all three primary colors on their plate and they added them to their Ritz crackers. This is a good time to talk about fractions (or patterns) and they can figure out how to break their color wheel in three parts so they know how far apart to space their primary colors.
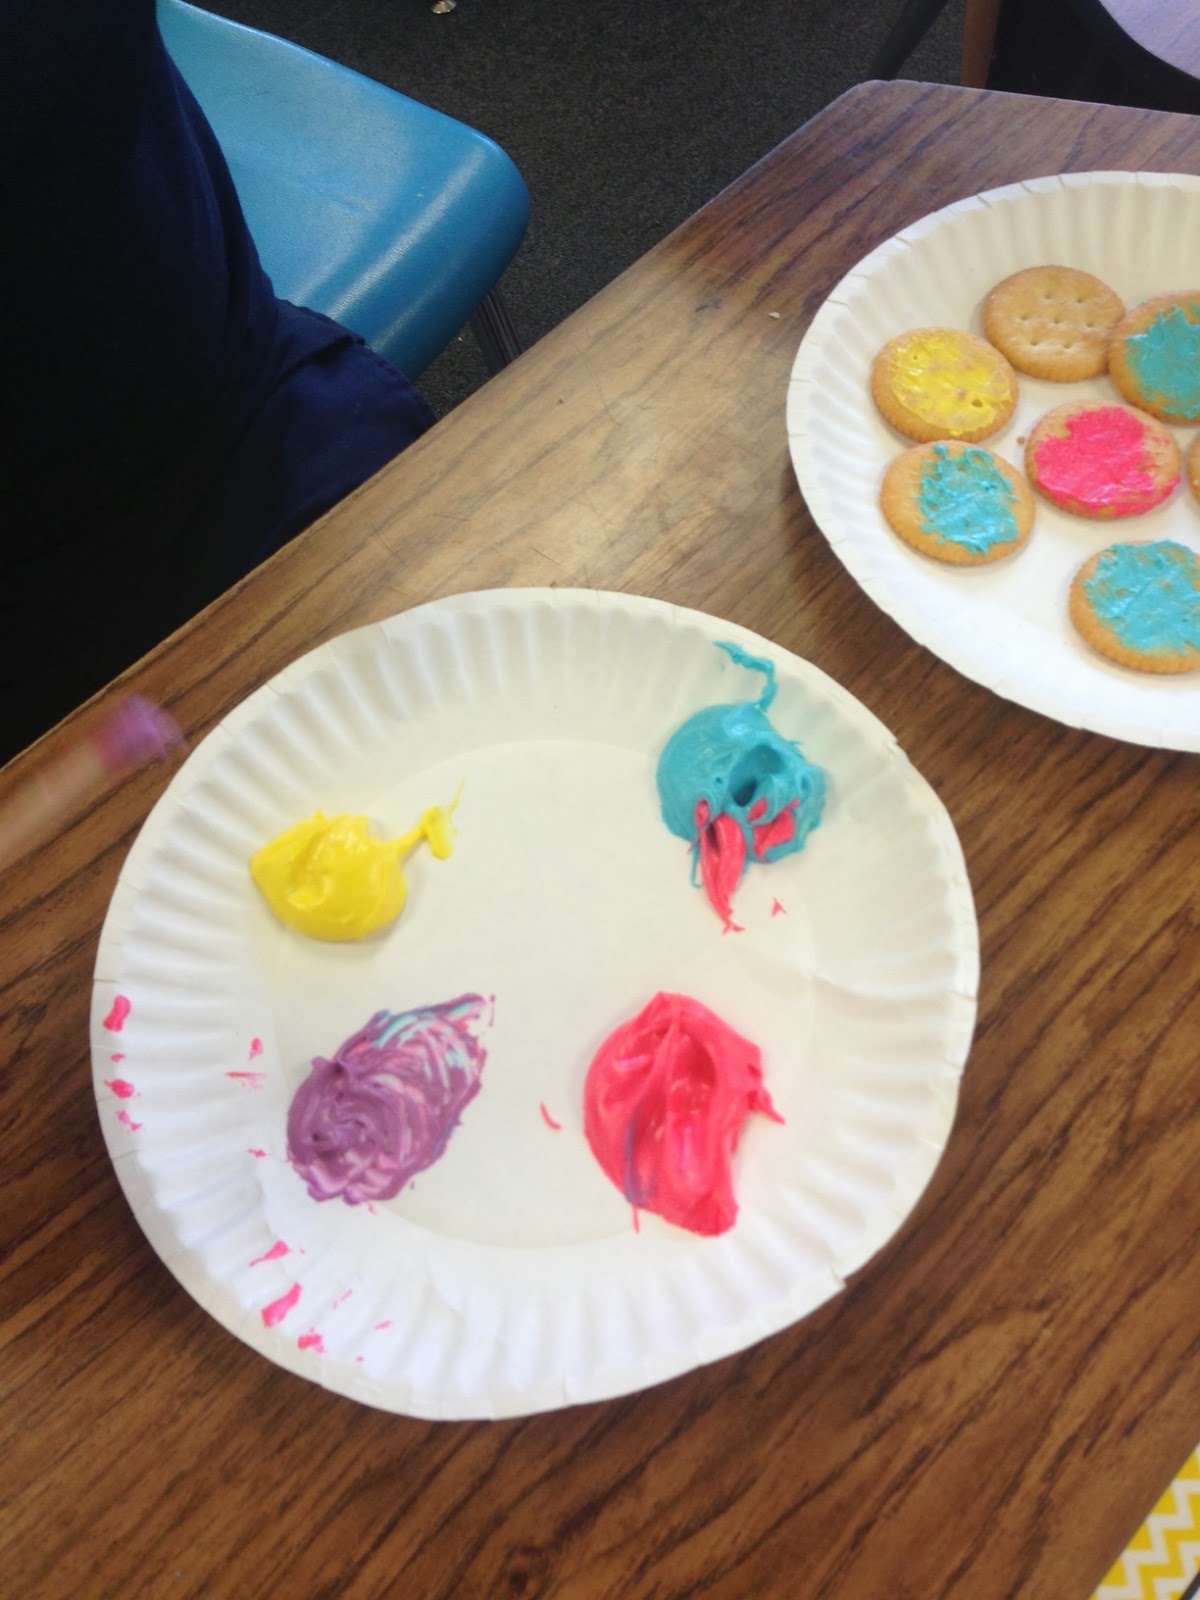
We then talked about secondary colors and how to make them. They took a small blog from their blue and red to mix up some purple, and then did the other secondary colors. Be sure to tell them to take a decent amount of frosting to mix up their secondary colors, otherwise they won't have enough to mix up the tertiary colors and will have to make more of the secondaries.
After we had done the secondaries, we talked about the tertiary colors. By this point the students were pretty confident in what they were doing and were able to mix and finish on their own.
They stayed really engaged in the task the whole time. We do art at the end of the day, so I made them take theirs home before eating them so as to avoid hyper children (sorry Parents).
I even heard some, "This is the best art project EVER" comments :)


 |
| Of course they have to test what happens when it's all mixed... |

This is an awesome visual and hands on activity! Luckily, I don't have to teach art but I would like to try this at home with my own kids. Thanks so much for linking up! :)
ReplyDelete~Holly
Fourth Grade Flipper
WOW.... what an awesome ART lesson!! My students will love this!! I incorporate art as often as I can and I have just the plans for this gem! Thank you so much for sharing!! Good thing it is art, because my students know we can't eat "Science" when we do experiments, but we don't have that rule for ART!! Ha..
ReplyDeleteSusan
LopezLandLearners